Monday, August 27, 2012

Cantilever schmantilever, kitty-proofing, and moving (aka "muscle-building")

Some sad news, my lovely Macbook Pro died a couple weeks ago, and so I've been sans "artsy-fartsy" computer and left with Peter's medically-inclined school computer to work with.  Couple with the fact that our new house doesn't have internet (trying to find the best deal, any ideas?), I haven't been doing much blogging.  But today that changes!  Peter's computer will just have to do for now!

I'm going to take a little break from packing and moving (yes, it's finally that time where the new house is no longer just our pet project, but our actual home where we eat and sleep since last week!), to share the latest in Remington!  We've been busy bees, and with our lease ending on Sept. 1, it's been quite the race to the finish line.   

First off, we wanted to have the second floor extension situation taken care of before we started moving anything into that room.  I'm not sure if you remember from earlier posts and photos, but the second floor extension was cantilevered, but poorly (and in 1920--it's amazing how much wood can rot in 90 years.), and we feared that it had been falling and thus resting on the weird mud-shed thing that is now absent from the back of the house.  Well, we can fear no longer!  We had our lovely neighbor Jun (a carpenter), take care of that issue.  After some more excavating into the building, it became clear that while the rotten beams were still present, new supports had been put up into the cantilever.  So, not so scary already, but Jun thought it would be a good idea to take the rotten beams out, add more supports, and then put up two large posts to brace up the cantilevered part.  All of the other houses in the neighborhood has had this done, as they obviously all tend to sag.  So, it's all brand new! He did an amazing job, and was supper efficient.  It still has to be painted (on the to-do list for this week), but we feel so much safer now.  I no longer have to tip toe into the cantilevered part and hope I don't plunge to my death.

It's amazing how much better it looks now.  And secure!

Jun even replaced the insulation (the original stuff had been turned into a rat's nest, and was covered in rat--well...you know what.  It was everywhere.), so we'll be toasty this winter. 

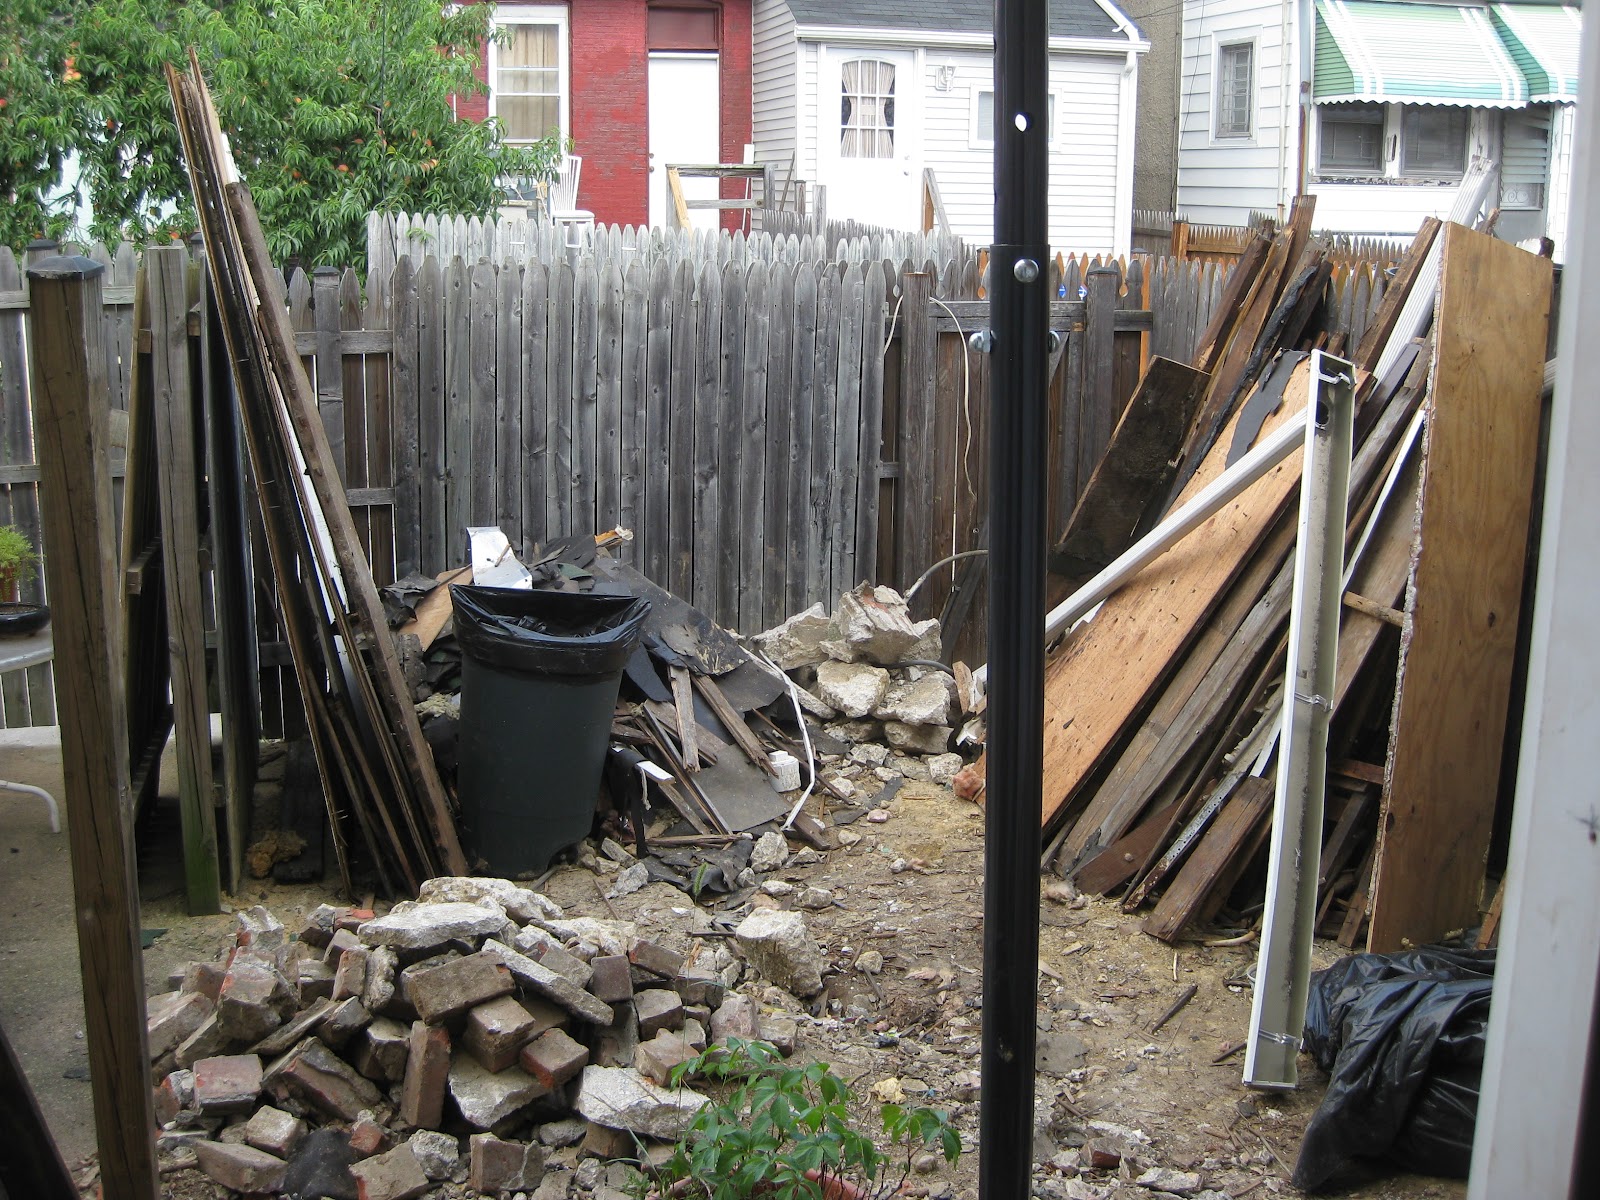
An amazing thing that Jun did before he started working on the house, was organize our trash pile.  I just had to add this, because we were thoroughly impressed.  It is still a playground for our little neighborhood rat friends (we hear them squeaking and scratching around in it at night), so we'll be taking care of that soon as well--before we get a citation for breeding rats!

Jun is excellent at trash-tetris.

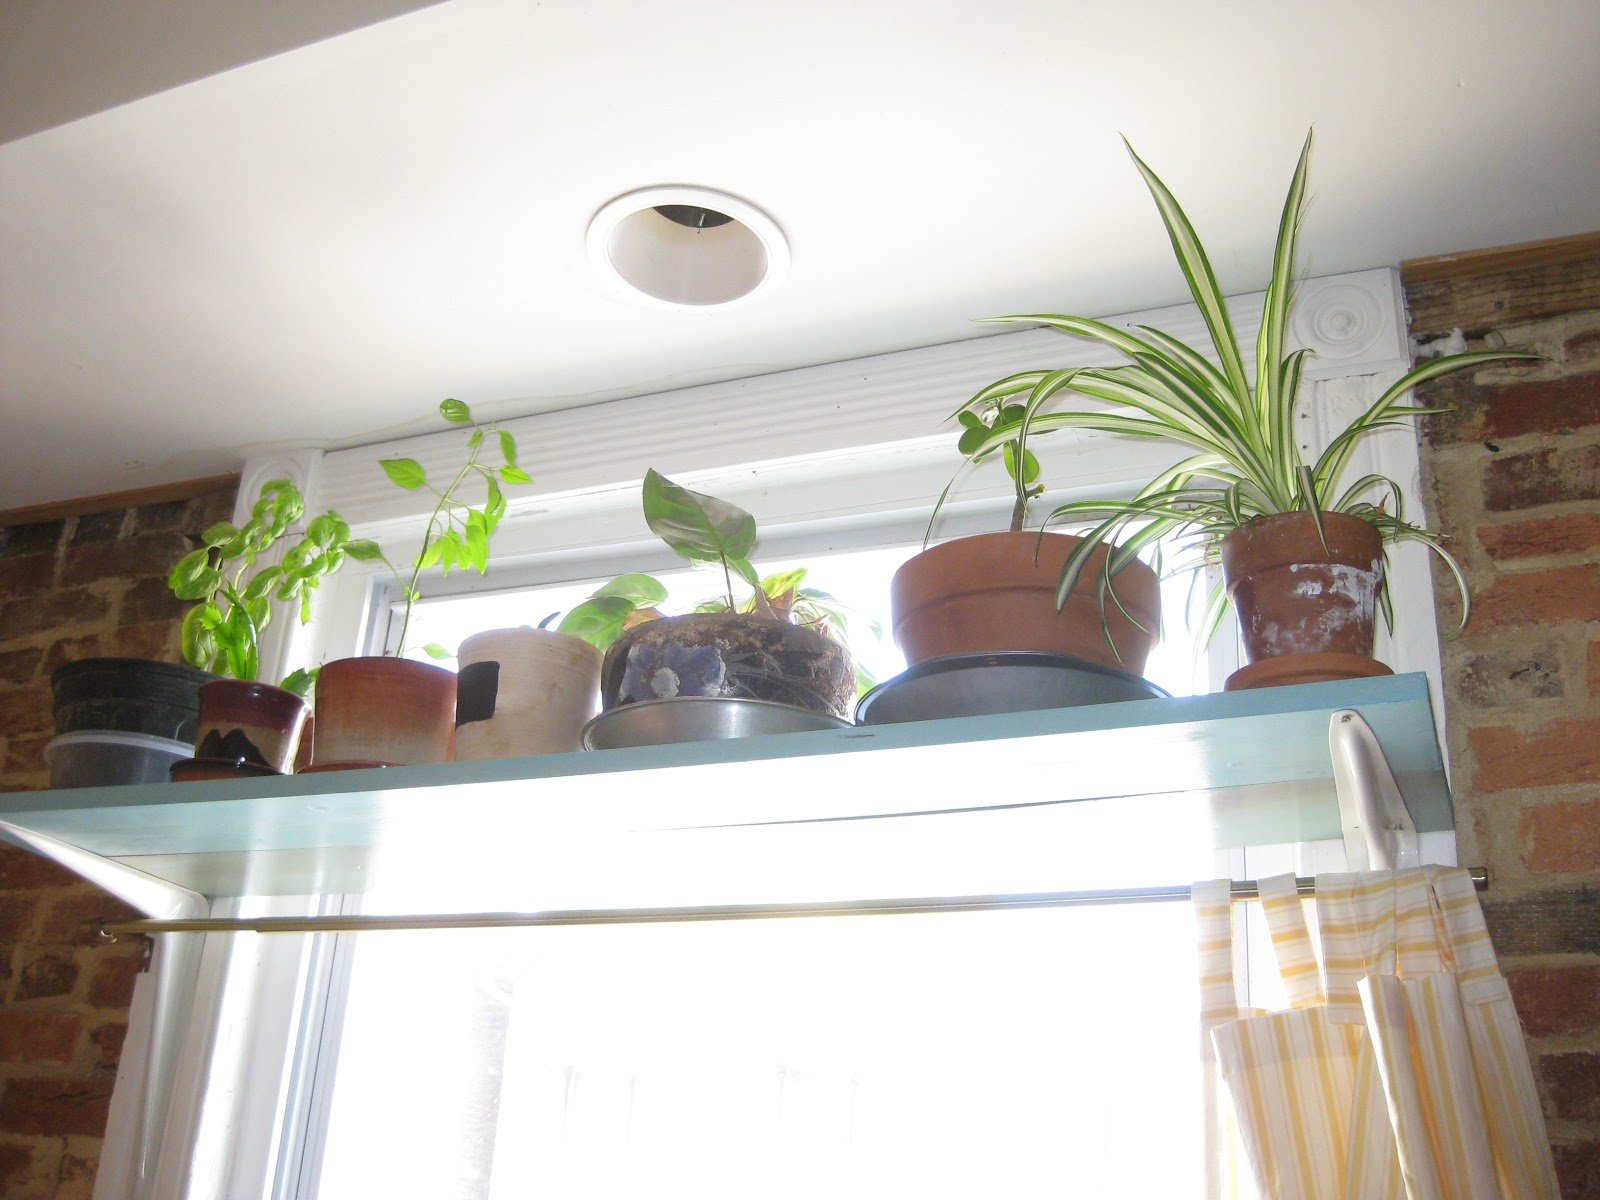
I've also been a little stressed about finding places in the house for my adored houseplants to go.  As some of you know, Kitty, our kitty, LOVES to eat houseplants, so it's always a battle with her.  But after some thought and planning, I think I came up with an attractive and functional way to have houseplants and also a houseplant-loving kitty:  a window shelf!  All sawed, stained, installed by moi.  The hideous curtains left by the previous owners--gone!  Replaced by the lighter, prettier curtain from our previous apartment (hand-hemmed by myself as well).

Kitty-proof plant shelf! 

Wide enough for two rows of pots. 

The side view.  This angle provides less glare, and you can see that the shelves are blue! 

 Those are the major projects (aside from the actual moving of boxes--a giant project in of itself) thus far.  I'll be posting more as things come up.  In the meantime, I've included a few more photos from around the house, just to prove that we're actually living in it.

Kitchen table.  Though it's been used mostly as a place for tools to sit and paint cans to hang out. 

Kitchen window. 

The little plant outside!  It's climbing our railing!  SO CUTE!!
 
The bed, confidently positioned in the cantilevered part of the room. 

I like the way my piano looks against the exposed brick.  It's fun to practice in there, too. 

Thursday, August 9, 2012

Ohhhhh, so you wanted to see the scary basement after all, eh?

Well, sorry to say it, but it's really not too scary anymore.  Especially now that we have a brand new DOOR to the basement!  Yup, we bought and installed a door all by ourselves!  Woo!   I have to admit, it was a little intimidating to start out--I stood there holding the hammer up against the nicely manicured drywall for a long while before I finally talked myself into taking action. "It won't fit until you tear this drywall out, just hit it," I said. "Ohhh but the dry wall is so nice--how can I mess that up?!" "Do it!!!!"

Needless to say, I finally got over my fear of messing up the drywall, and now we have a door.

The photos of the basement are for Davie, who challenged me to show the basement photos a while ago. Unfortunately, the photos of the basement are post-work. Before, there were scary moldy shelves and piles of wood, and a wet rotting spot in the corner. But now, it's not too shabby, though I wouldn't take a nap down there anytime soon...

The view of our brand new door from the side. 

Golly gee!  What an attractive door.  Peter installed the knob, and did an excellent job (meaning--it opens and closes!).

Whoa, sure you want to go down there? 

Oh.  That's all there is? 

Where are the puddles, mold patches, and the RATS?

Sorry, no mold here.  This basement has been scrubbed down, and dried out! 

Stairs are a little dirty at the moment.  Full of drywall from the door project! 

Wednesday, August 8, 2012

The inside scoop...

Here's what is on the inside: We've got two bedrooms, one bathroom (that has two toilets--I know, hilarious, right? Intimate. Real intimate.), a living room, kitchen, and unfinished basement. We used to have a rat mansion, but that's gone now (refer to previous post). As you can see by these photos, there is no door to the basement (which is going through dehumidifier rehab after a long, hard life of mold infestation and leaks from the sewer line break [again, refer to the previous post]), and so this is quite the problem. Whatever shall we do? Stay tuned for the next post. I have a feeling it might address the problem. In the meantime, check out our house.  I have to apologize, though.  These photos are the same as what I posted on facebook, so if you're expecting new photos, I'm sorry to disappoint you...But hey, they're new captions!

Here's the living room.  The drapes came with the house.  Stylish, huh?

Notice the plastic that leads to the basement...it makes it look like we're up to something mischievous down there...

Our lovely exposed brick wall that leads into the kitchen.

Kitchen.  Yes, the sink is not below the window like one might assume it would be.

Instead, the sink is over here.  The plumbing in all of these row homes is in the center of the home instead of the side.

Stairs leading up to the two bedrooms.

Bedroom #1, though I think this will end up being our office room/guest bedroom.

Bedroom #2, notice how there aren't any closets?  Whatever will we do?  I think that will be another post as well.  =)

The photos you have been looking forward to.  Toilet #1... 

Two sinks,

The other toilet!

From the other side--you can walk all the way through to the other bedroom. 
That's it for now!  Stay tuned, we have projects lined up all they way until the end of August.  I'll try to post often.  Thanks for reading!

Tuesday, August 7, 2012

Here's what we have to work with:

Here it is!  The house is an 816 square foot row home. As the sale was "as is," we've had a few things we've needed to work on before we actually move in at the end of the month. Including: getting our sewer line repaired (it was broken a foot away from the foundation...yuk), tearing down a shed in the backyard that was basically a resort for rats (also, yuk), and getting the roof repaired (there was a hole in the flashing near the chimney that could fit a fist through it...wet!). So with these things done, it at least is dry, less smelly, and approaching "livable." It's got great bones, though, and we're excited to make it our own!

Here it is!

The view of the backyard post tear-down of the shed--let's just call it the "rat house." 

We're having to support the cantilevered second-floor extension because we suspect it was resting on the rat house. 

We're proud of our use of the "screw-jack." 

Unfortunately, I forgot to take a picture of the backyard before we tore down the shed.  Believe me, though, it was definitely an eye-sore.  Of course, now it's even worse with all of the wood waste strewn around the yard, the concrete torn up from the plumber, and the exposed rat poop.  Oh yeah, we're living the dream.  They always say it gets messiest before it gets neat, right?  Things are coming along then, I'd say!